There are two questions I get asked frequently from this site (usually via the contact form, although I wish they’d use the comments section below so that others can leverage the answers; the comments section does not require any login/userid):
- What’s your favourite camera and which one do you recommend for me?
- How do you manage all the images that you take on your travels?
To answer the first question is one of my goals for this year, but it will take some time to develop that content. I’d like to instead focus today’s post on the second question. Through a lot of trial and error, I’ve landed on a good image workflow and storage flow that recently survived what could have been a catastrophic loss of all my images.
To try and fully answer the question, I propose to split the answer into three posts:
- Data integrity at capture: SD Card Comparison
- On-site image workflow: Culling, backup and editing
- Off-site storage and backup: Storage, backup and disaster protection
Data integrity at capture: SD Card Comparison
Today’s post will focus on data integrity at capture where we’ll look at a number of SD cards and do a quick comparison. I’m always surprised when I see friends with $2,000 cameras using $10 SD cards that the camera shop threw in for free to sweeten the deal. When I ask them why they’re using such a slow and potentially fragile card, they look at me blankly. That tells me that there isn’t enough information out there about the importance of using high quality SD cards.
I should put a disclaimer here that all the products that will be mentioned in this series were purchased at full retail price from authorized retailers; there were no free products provided. This provides me the freedom to tell it like it is. If you choose to buy a product from a link, this site may earn a small commission which is used to offset the cost of running the site.
Card failures
Over the past three years, my partner and I have travelled all over the world with our Fujifilm, Leica and Sony cameras. During that time, we’ve never had an unrecoverable data integrity issue with any SD card, but we’ve had three SD cards break in different ways.
The first was a 32GB Sandisk Extreme card that split at the seam; it literally came apart while ejecting the card from the camera. Fortunately, by using very thin tape, I was able to piece it back together, download the images from it, format it, and then discard it forever. Up until that point, we had had good luck with Sandisk cards. We continue to have a number of Sandisk Extreme Pro cards to this day which have managed to stay in one piece.
The second card that failed was a very expensive (at that time) Transcend 285W SD card where a small plastic guide broke off inside my Fujifilm X-Pro2. Thankfully, when the card wouldn’t come out cleanly, I didn’t force it because it could have done permanent damage to the camera. After some very gentle movement and by turning the camera on its side, the card came out.
It wasn’t obvious at the time why the card was hard to take out, but when trying to put the card back in, it became apparent that something had jammed inside the camera mechanism. With some very, very careful prodding with a toothpick, the plastic guide came loose from the SD card slot and the plastic dropped out. That SD card and the camera’s slot continues to work fine today, but it could have been an expensive repair if things had gone slightly differently.
The third card that failed broke during transit somewhere. I take responsibility for that one because it was in a bag with a number of hard plastic items and it somehow must have gotten wedged during our travels. The Toshiba card cracked and was tossed before it was even used. If it had data on it, I’m confident it could have been carefully inserted into an SD card reader and the data downloaded.
The point of sharing the three examples above is that you will eventually have a card break, you will likely be able to get your data off the broken card, and it could do damage to your camera or leave you without a memory card during your travels when you need it the most. Therefore, I have been carrying a handful of new SD cards during my travels and I have a routine where I toss cards after two years of use. It was rather wasteful and I’m glad that my routine will now change.
Dawn of a new SD card era
Something has recently come on the market that has changed the game for durability and will enable a change in my routine of throwing away cards after two years: The new Sony Tough SD cards. These little gems of quality engineering have no seams, are extremely robust, and don’t have the small plastic guides that broke on my Transcend card. Sony also removed the lock slider, which I’ve never used before and had forgotten that cards even had. I like these Sony cards so much that I’ve now switched all of my cameras over to the Sony Tough cards.
Durability is one thing, but speed is another. Today’s cameras can often leverage UHS-II or V90 speed cards and do impact the overall performance of the camera. In my testing, there were some surprises with cards that are fast to read, but feel lethargic in my 50MP Fujifilm GFX50R. It’s such a big impact that I could easily tell which card is in the camera. I’ve now gotten rid of that card and replaced it with a Sony Tough card.
Speed comparison
There are a number of excellent sites on the web that do scientific testing of hundreds of SD cards. I don’t want to replicate their work, nor do I have the exhaustive list of cards at my disposal to conduct the same testing. However, if I’m going to put something on my site, I want to have absolute confidence in the information presented, so I conducted my own testing of the SD cards I’ve used in the past.
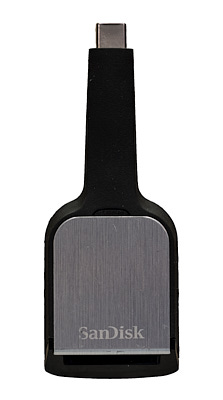
I used the previous version of the excellent Sandisk USB-C SD Card Reader (the new one is larger and more robust, but speed is the same) and Diskmark 2.1 software which provided consistent results during the testing. The computer used was the MacBook Pro 13″ 2018 with SSD drive; I included the benchmark for the computer used to run the test so that you can cross-reference the tool’s output vs. what Apple says.
| SD Card Tested | Sequential Read (MB/s) | Sequential Write (MB/s) | Random Read (MB/s) | Random Write (MB/s) | |
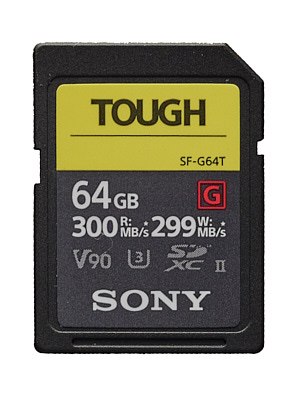 | Sony Tough 300MB/s | 216 | 218 | 51 | 14 |
| Transcend 285MB/s | 239 | 168 | 34 | 7 | |
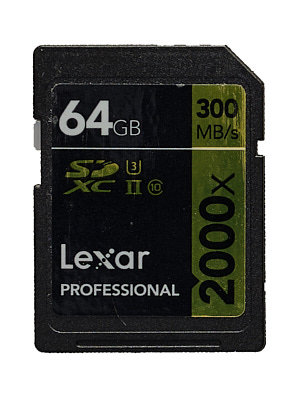 | Lexar 300MB/s | 239 | 224 | 26 | 5 |
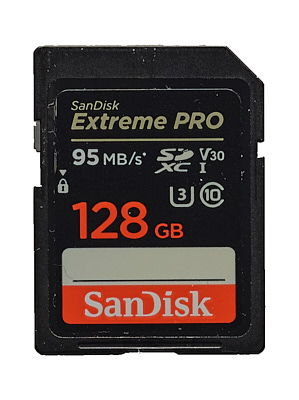 | Sandisk Extreme Pro 95MB/s | 92 | 84 | 28 | 9 |
 | Kingston 30MB/s | 49 | 12 | 7 | 4 |
  | Macbook Pro 2018 | 3,156 | 2,934 | 117 | 71 |
I think the test results tell us something interesting that might provide the reason why the Sony Tough feels faster in the camera than the other fast cards such as the Lexar or Transcend. The random read and random write scores are significantly higher. When browsing through images on the GFX, this translates into the image appearing in an instant, without any pause when pressing the play button, and the same when zooming in to check focus; there’s a noticeable improvement in speed when using the Sony Tough card.
Formatting the SD card
When friends have issues with new SD cards, it almost always comes down to how they formatted the card. Most people (very logically) will try to format the SD card on their laptop or PC using the built it tools like Disk Utility on the Mac or Disk Management on Windows. This is fraught with problems because there are many choices for how to setup the drive, with various file formats and partitions. Instead, I recommend taking one of two approaches:
- If you have one camera or use one brand of camera, I recommend formatting the SD card in the camera. Don’t bother formatting it on the PC. I also recommend formatting the SD card every few cycles of use (perhaps every three months) to clean up any “trash-can” or operating system files that often get dumped on the card while transferring images to your laptop or PC.
- If you have multiple cameras, I recommend downloading the SD card formatting utility from the SD Card Association. I also recommend formatting the SD card every few cycles of use for the same reasons given above, to clean up any OS files that get dumped on the card while transferring images to your laptop or PC.
Conclusion
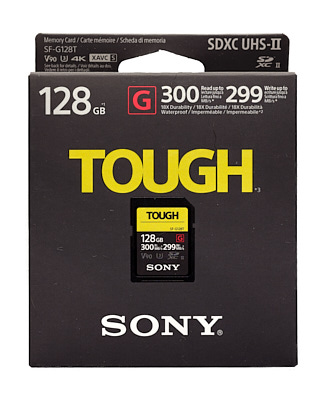
In summary, I highly recommend investing some money into a good SD card, and for the first time in SD card history, I feel that the Sony Tough SD Card is built to last and is worth spending extra money on. In the long run, I think this card will save us money because it is built much better than previous SD cards. I won’t be cycling it out every few years and will provide an update on how reliable they turn out to be over time. I’ve switched all of my cameras over to the Sony Tough and just picked up a 128GB card for the GFX.
Next up in the series will be a suggested workflow for culling, backing up and editing images on the go.
Discover more from fcracer - Travel & Photography
Subscribe to get the latest posts sent to your email.
Great analysis of a much passed over topic.