The Fujifilm X-Pro2 (X-Pro2) is now seven years old. With all the hype around the X100 cameras, it’s surprising that the X-Pro2 isn’t getting the same attention. I’ve had mine since release date and it’s a camera that I’ll never sell. While the X-Pro2 continues to be a great camera in 2023, the real reasons I keep this camera are three fold:
- It’s my first “real” camera. My partner got it for me as a birthday gift and it’s the camera that made me fall in love with photography. I had the Fujifilm X-T10 and X-Pro1 prior to it, but it’s the X-Pro2 that really tugged at my heart.
- It’s gorgeous. The mix of old and new is in perfect harmony, with the choice of optical and electronic viewfinder, and the ability to magnify the optical viewfinder to match a variety of lenses. It’s sized just right to fit perfectly in your hand, without being overly large or too small.
- It has an amazing and unique manual focus experience. The purpose of this post is to discuss this reason.
The X-Pro2 has a totally unique approach to manual focusing lenses that makes for an incredibly compelling and addictive user experience. It’s so good that I wish Leica could find a way to implement this in a future M camera. I’m hoping the future M12 will have something similar.
Manual Focusing using the OVF and ERF
Fujifilm implemented a little known feature in the X-Pro2 called the Electronic Rangefinder (ERF). The ERF turns on a small superimposed digital image from the sensor onto the bottom right corner of the Optical Viewfinder (OVF). Think of it like an EVF floating above the OVF. What this does is provide the best of both worlds, a real time view of the world through the OVF, while providing a digital view through the ERF.
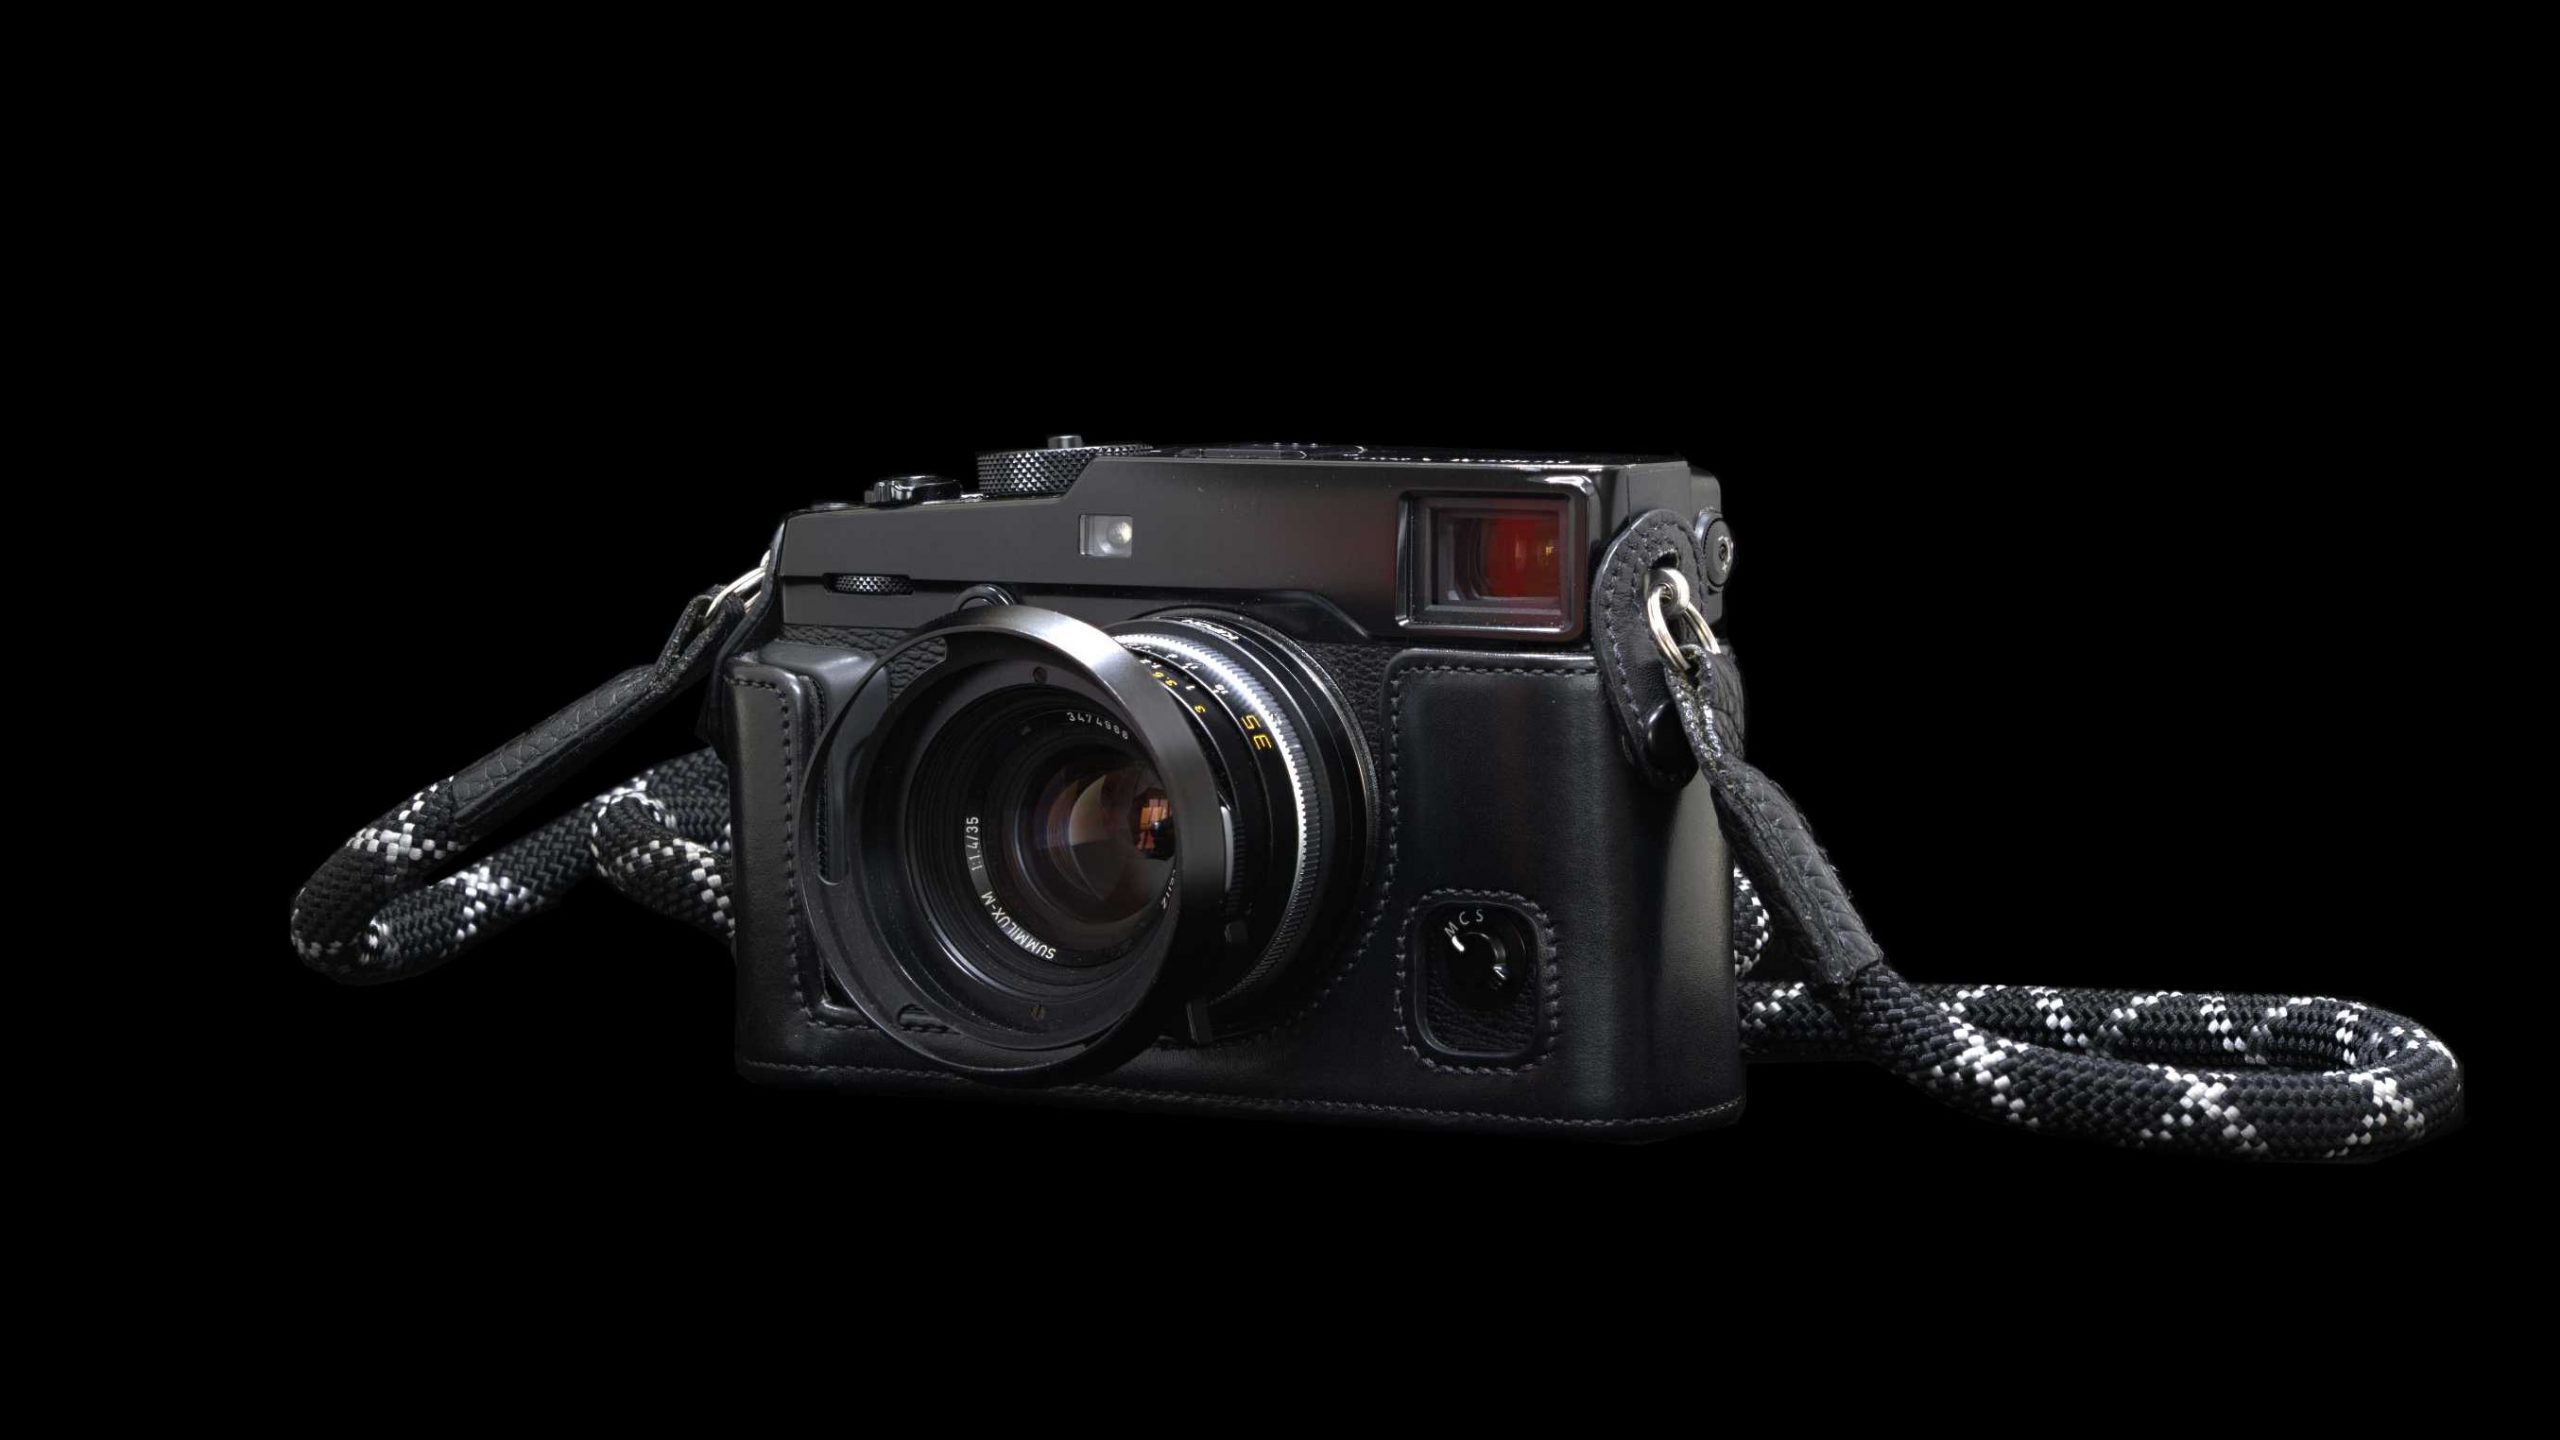
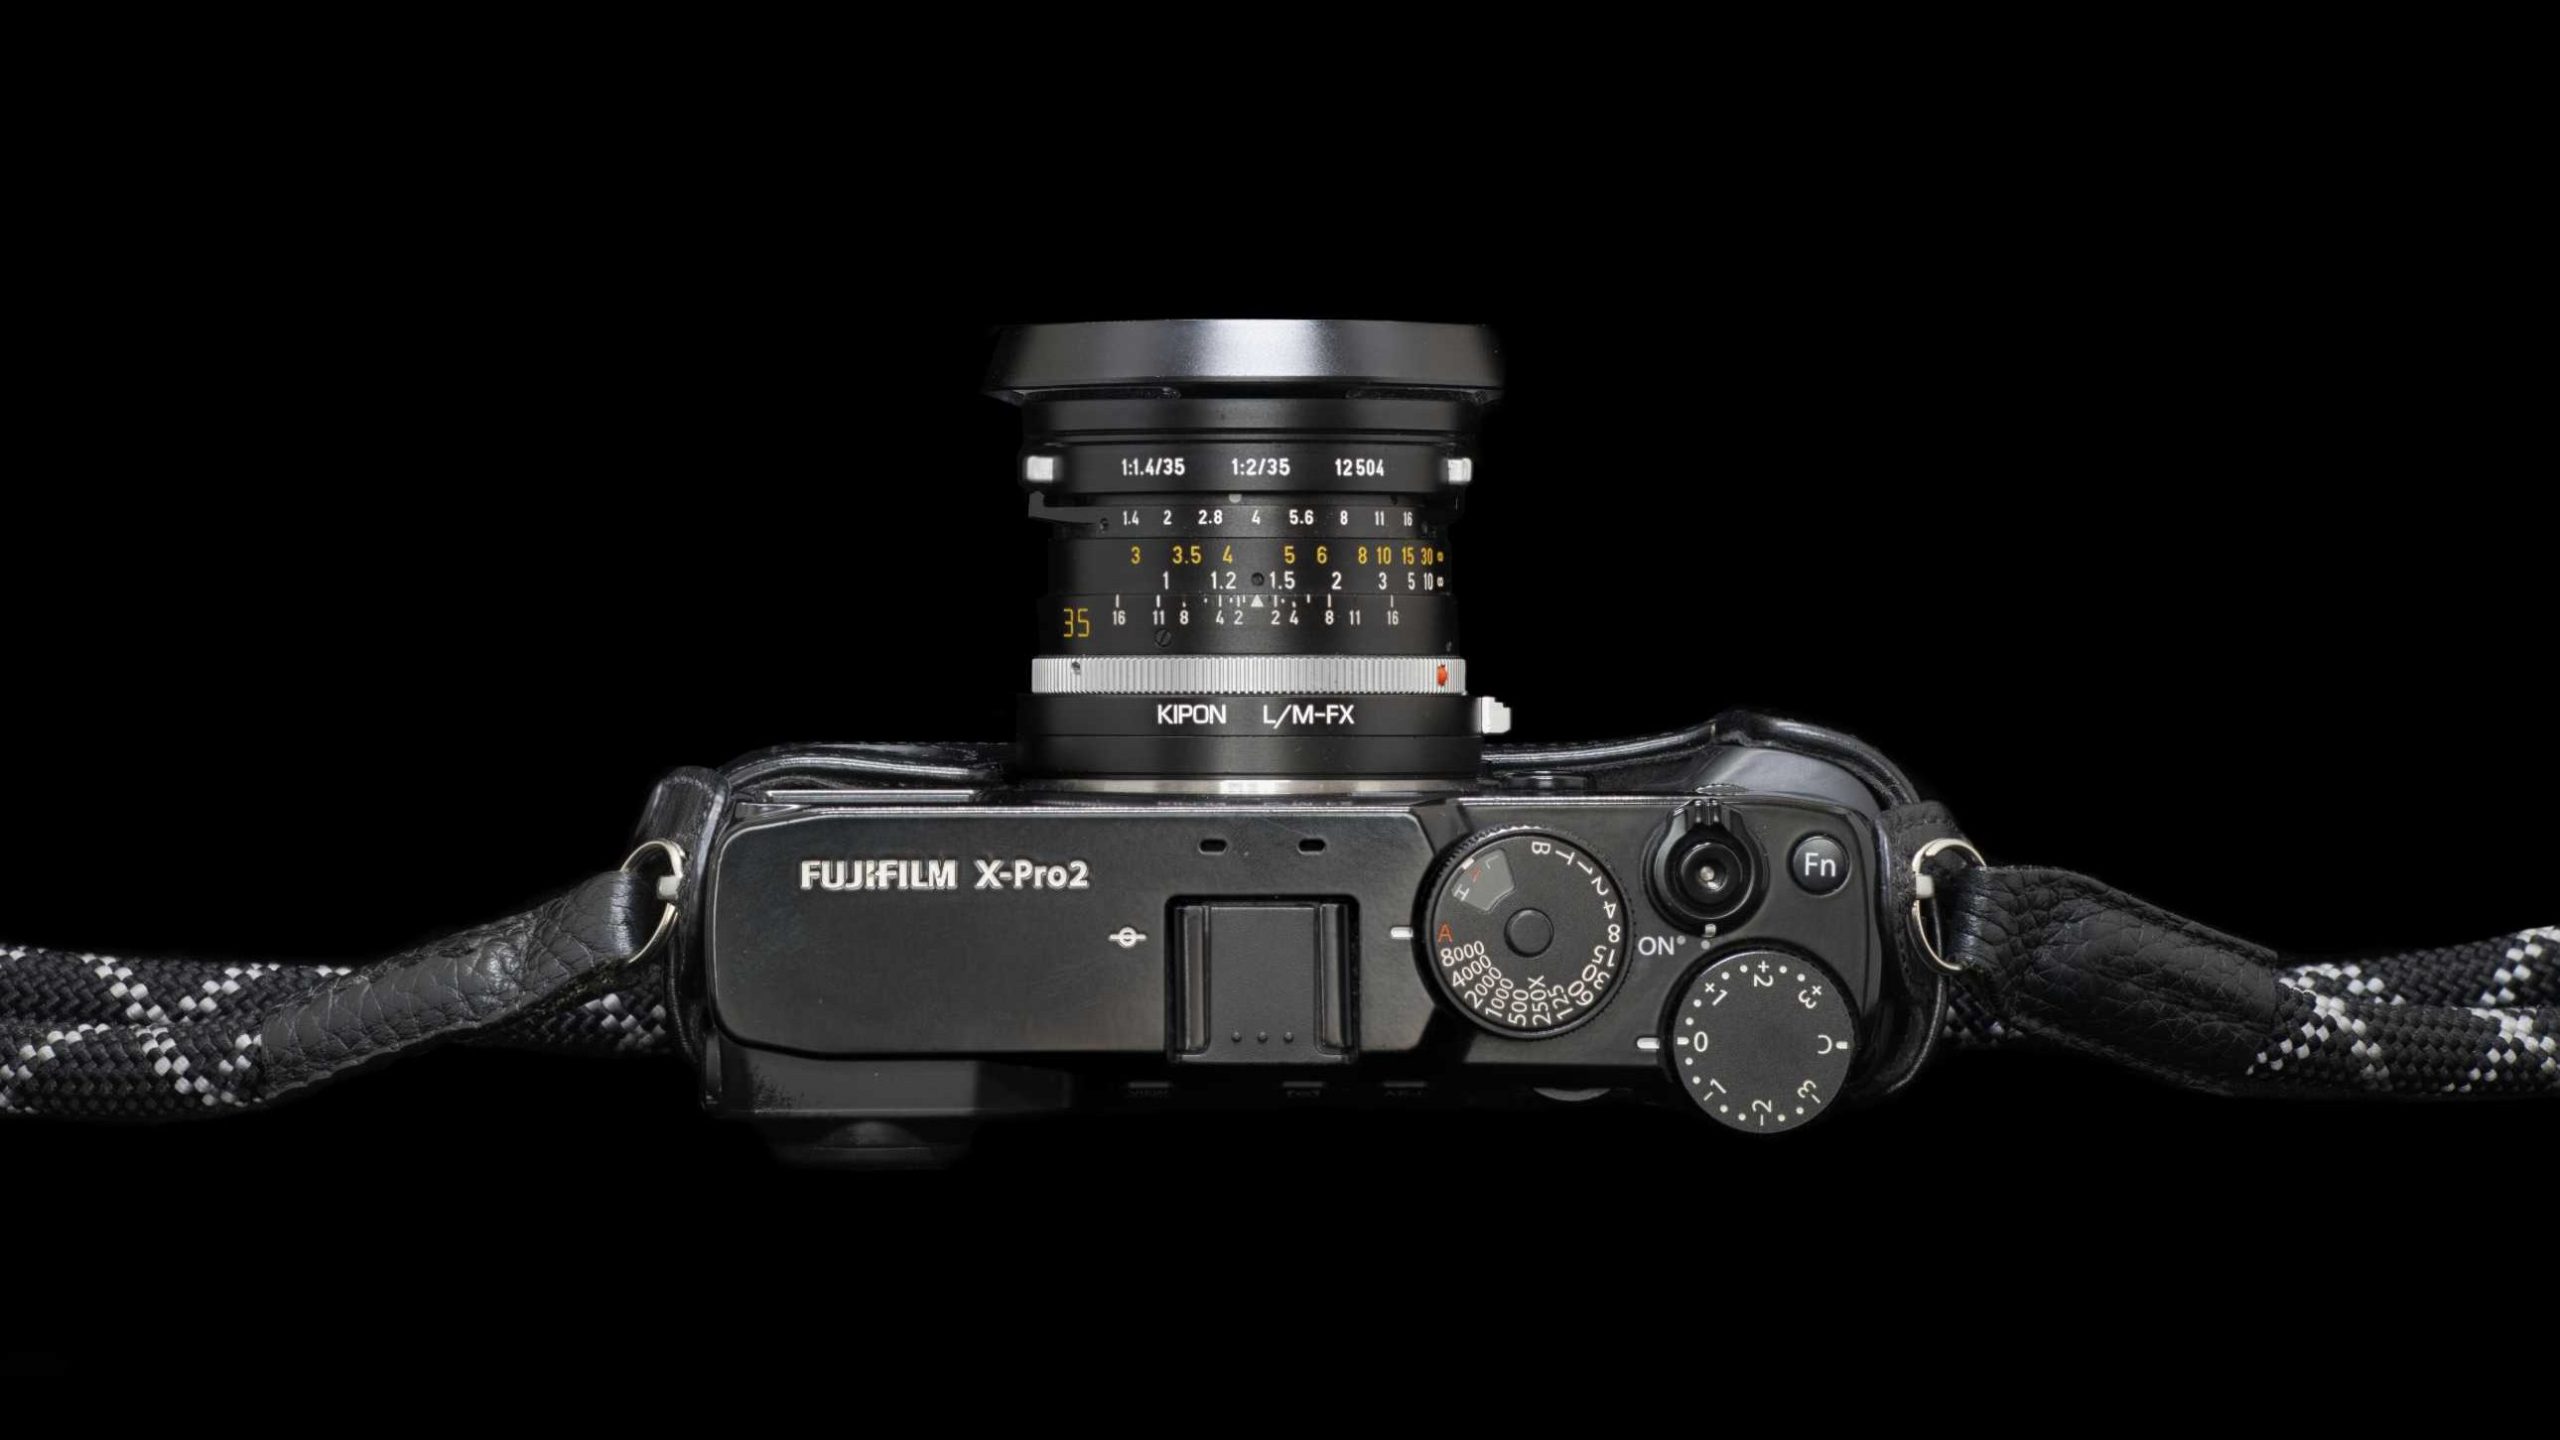
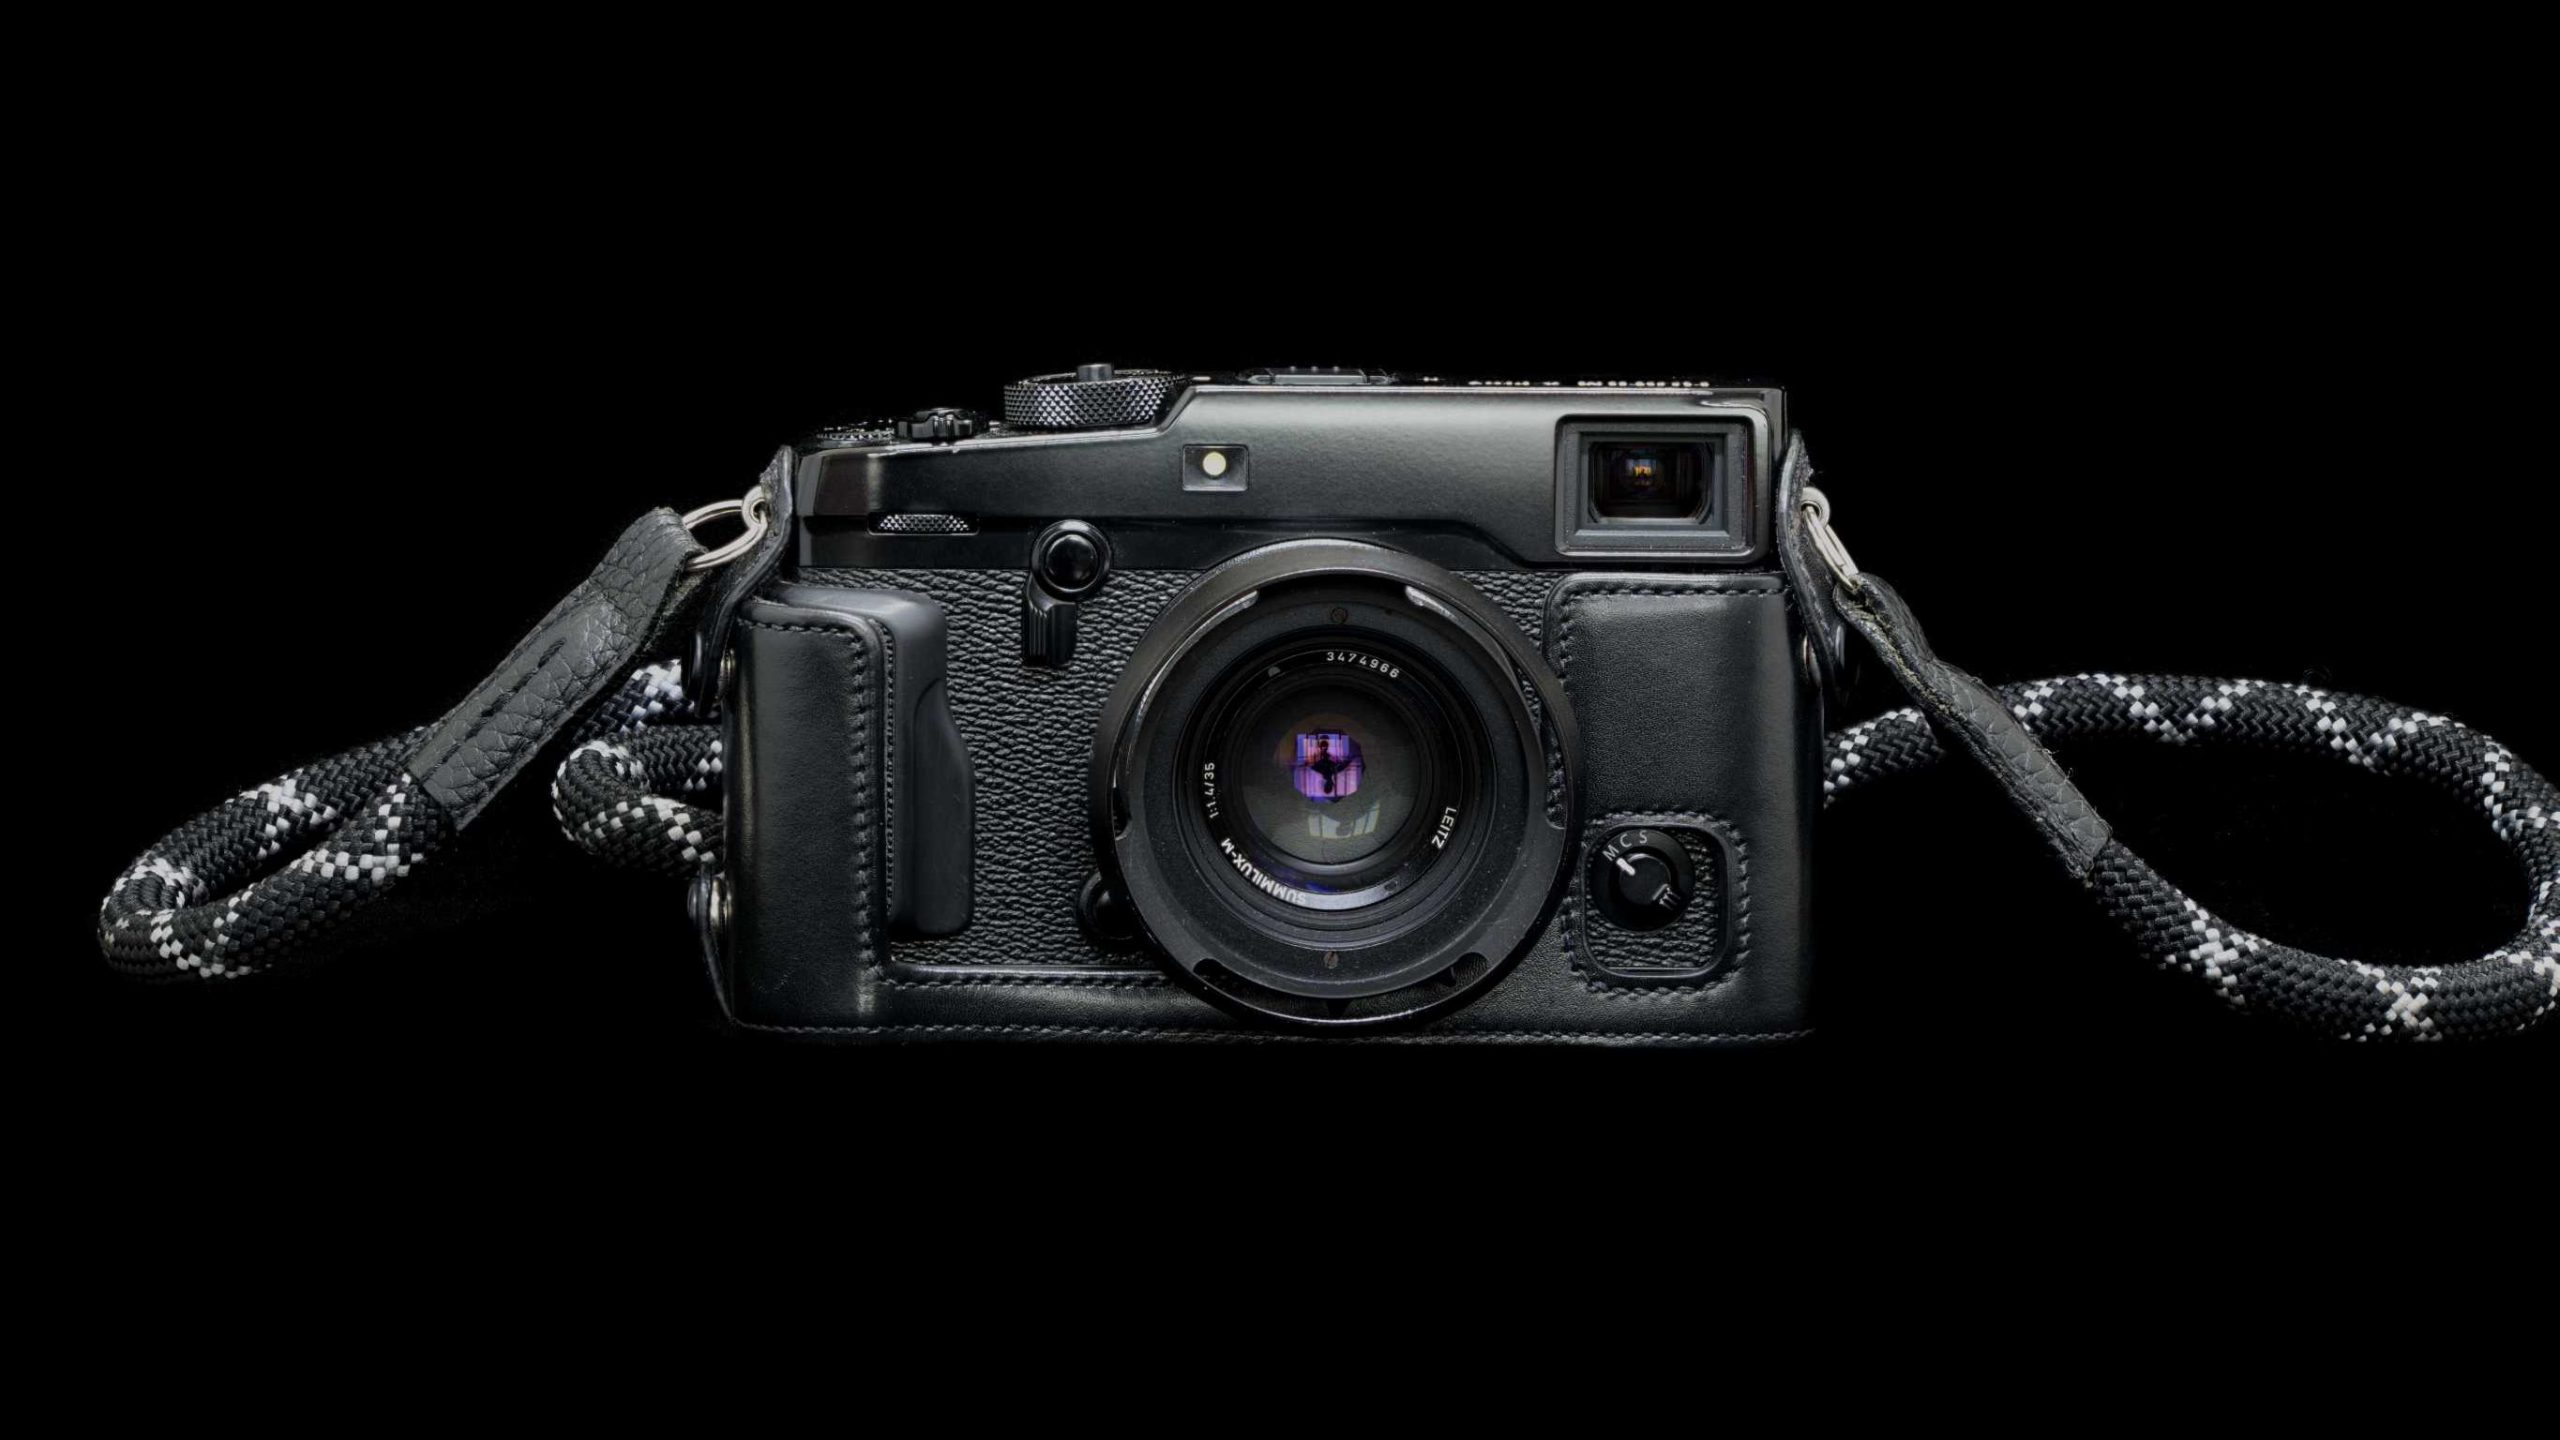
While this is cool regardless of focus modes, the user experience really comes into its own when adapted manual focus lenses such as those from Voigtlander or Leica are used. For the examples in this post, I’ll be using the Leica 35MM F1.4 Summilux with a Kipon M-to-X adapter. Here’s what the setup looks like:
How to Setup the Camera for ERF
To ensure that you can get the ERF experience, please ensure the camera is setup as follows:
Drive mode: Single or Continuous
Shoot Without Lens: Turn On
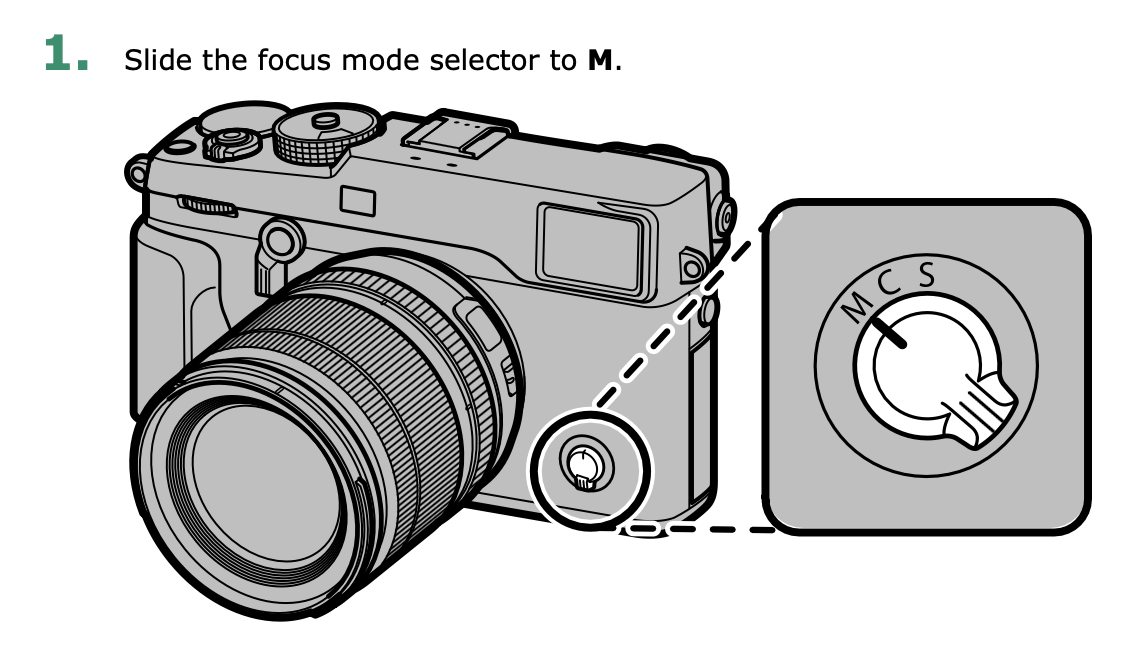
Focus mode: Manual
MF Assist: Turn on Focus Peak Highlight and select the colour and peaking sensitivity that you prefer. I prefer low sensitivity and white colour.
Focus Area: Single Point (small box)
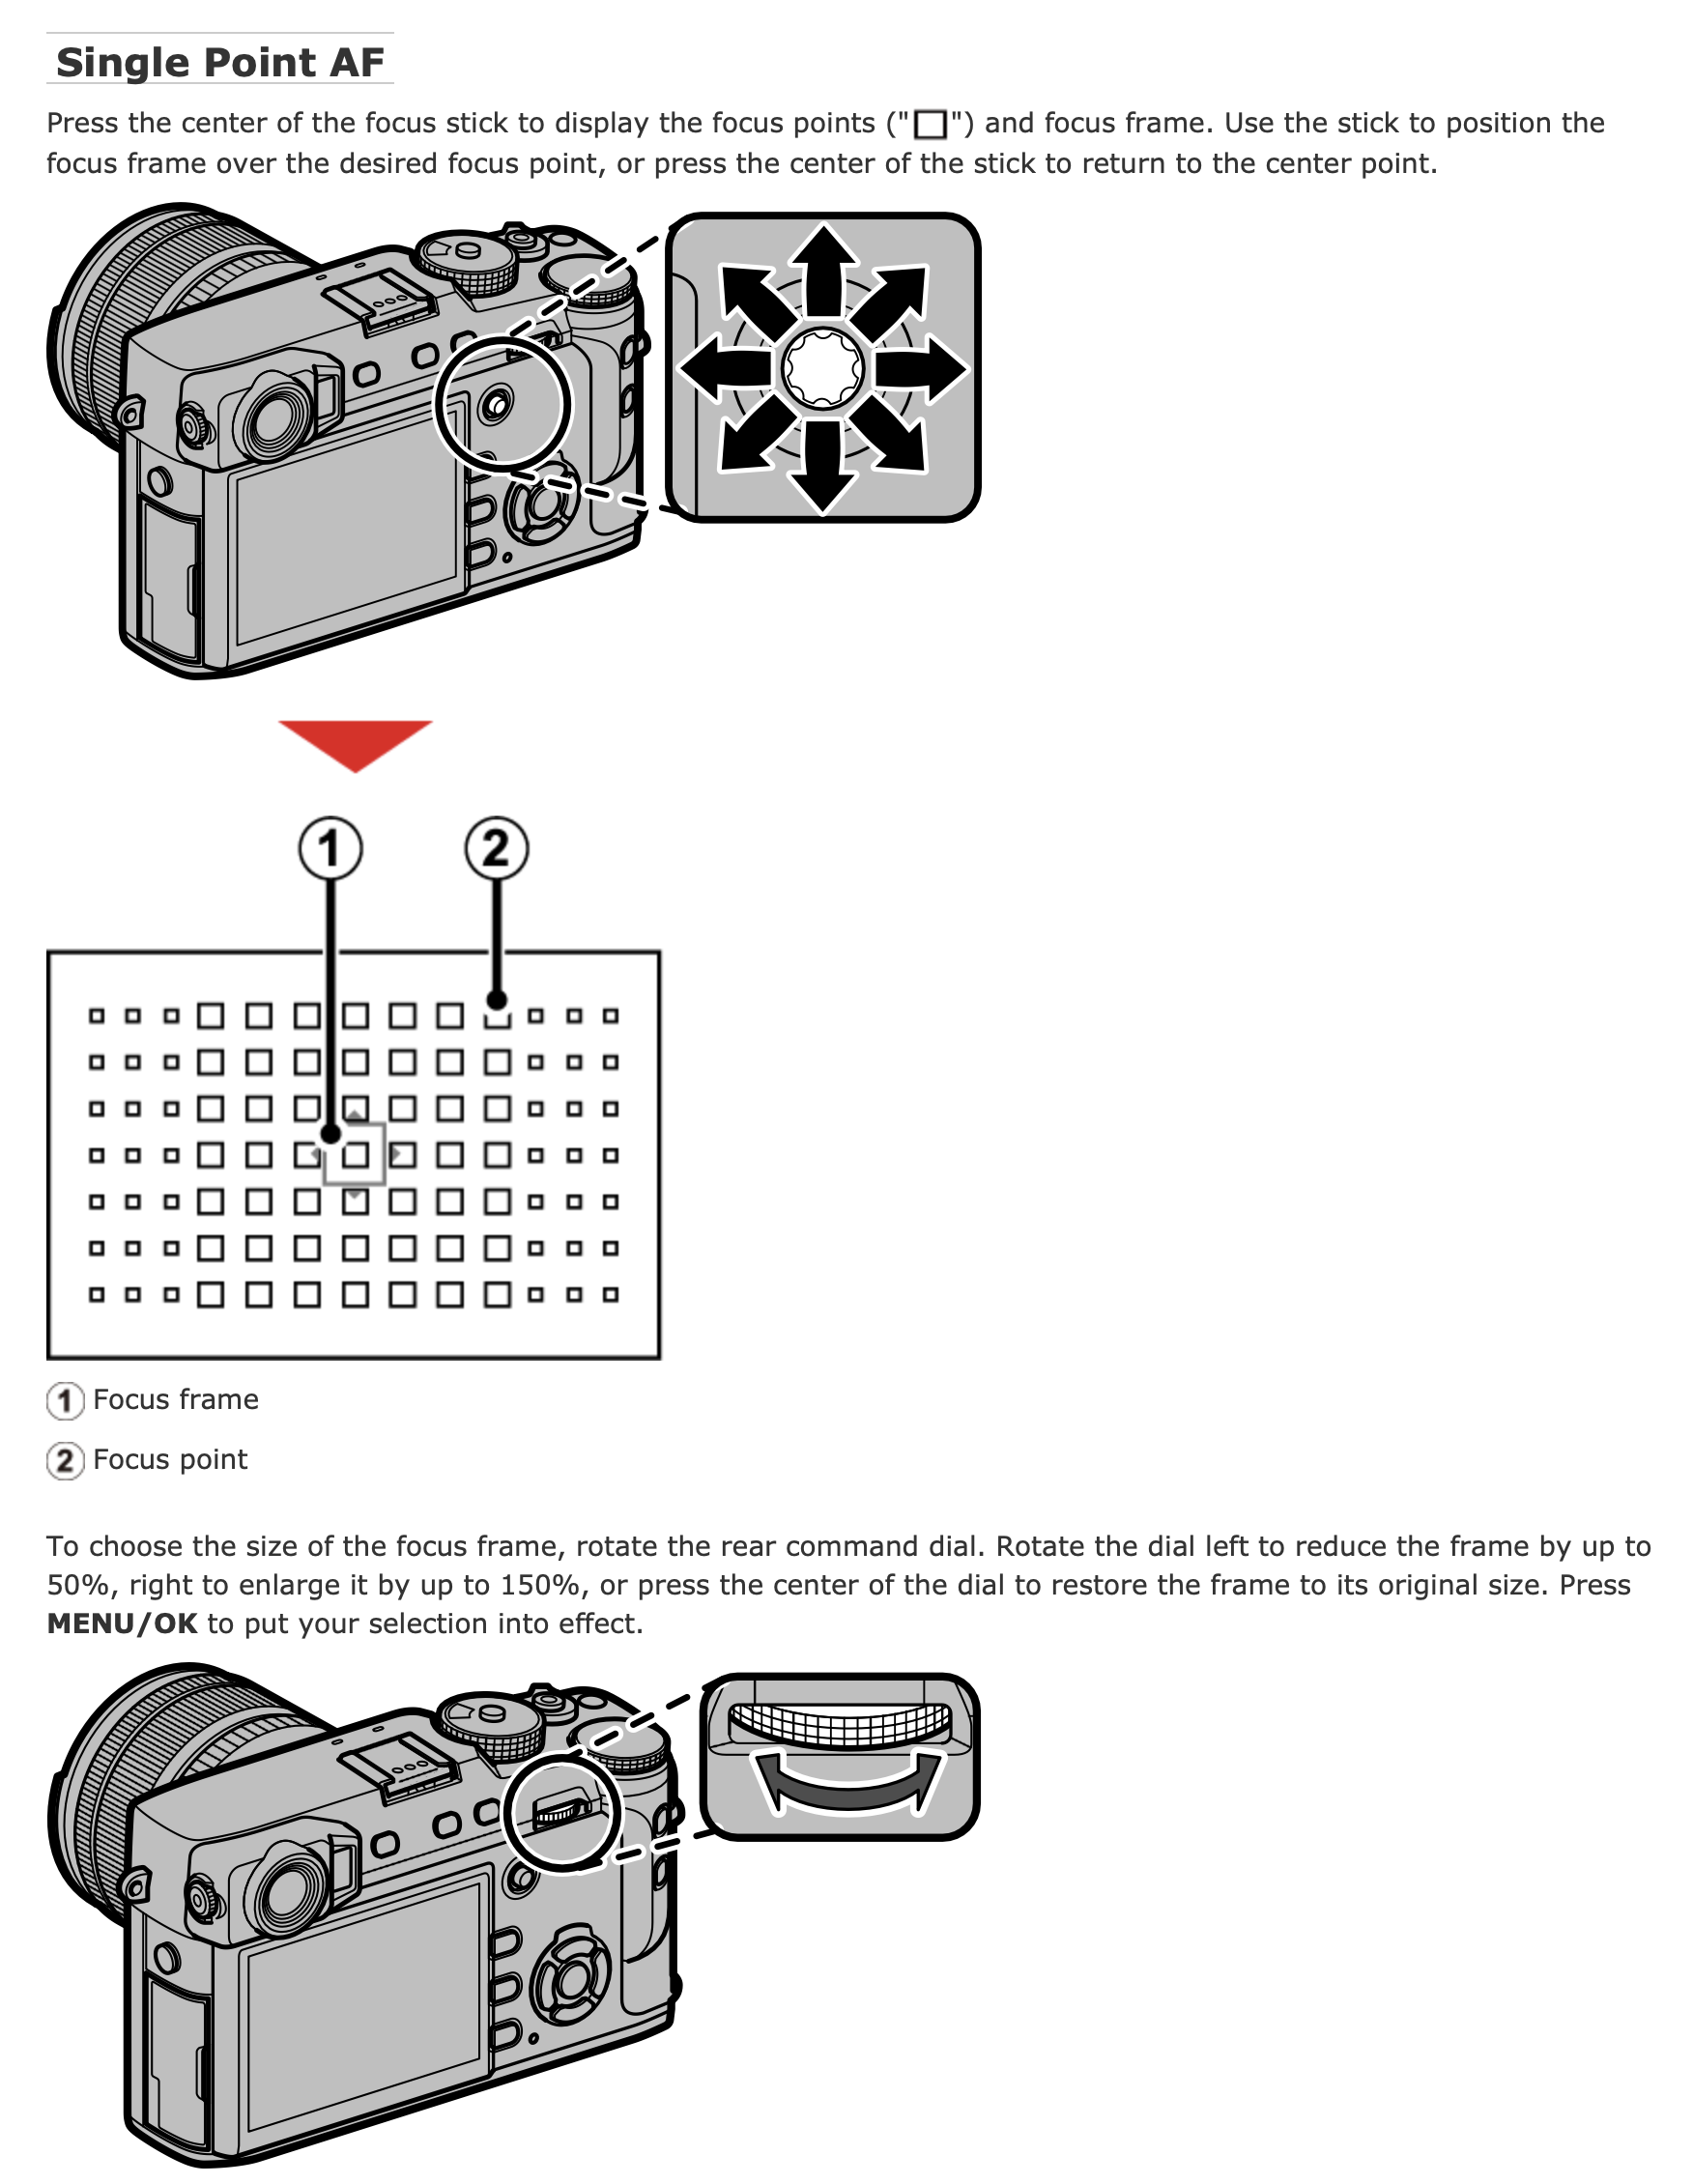
Focus Area location: Centre the single point focus area in the middle of the frame so that it’s easy to focus and recompose
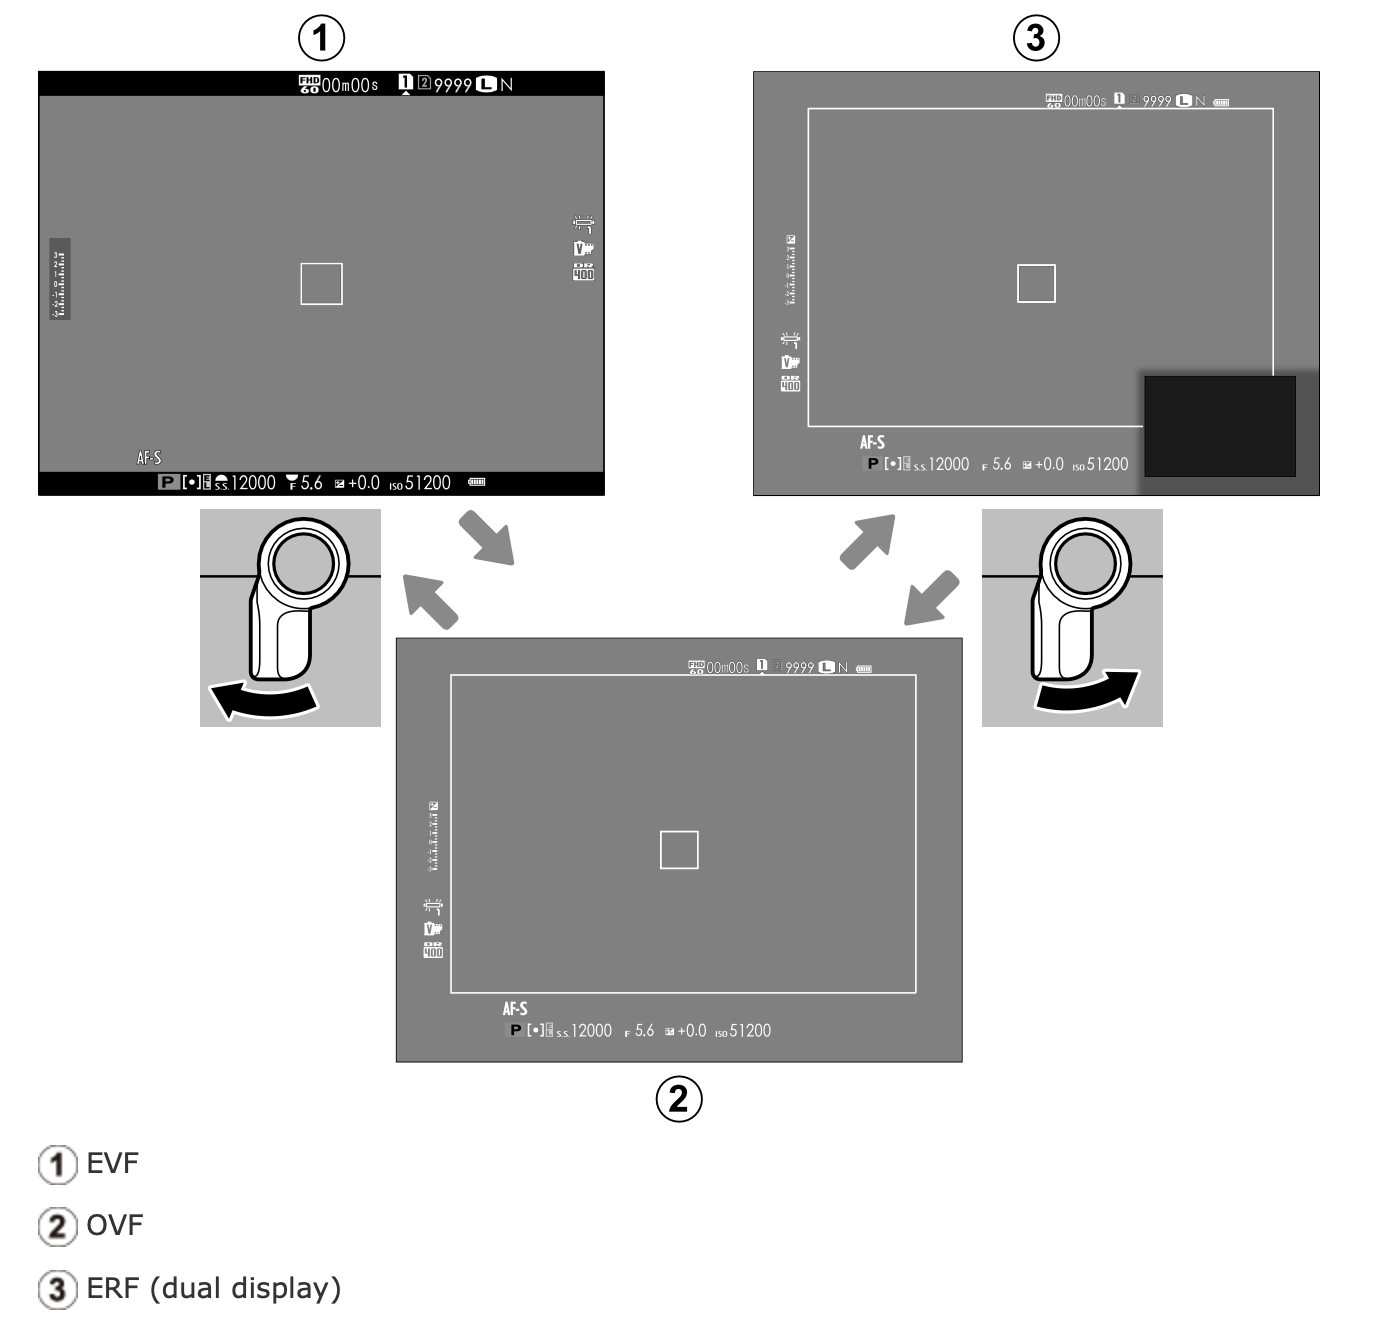
OVF/EVF: OVF mode by using the Viewfinder Selector on the front of the camera
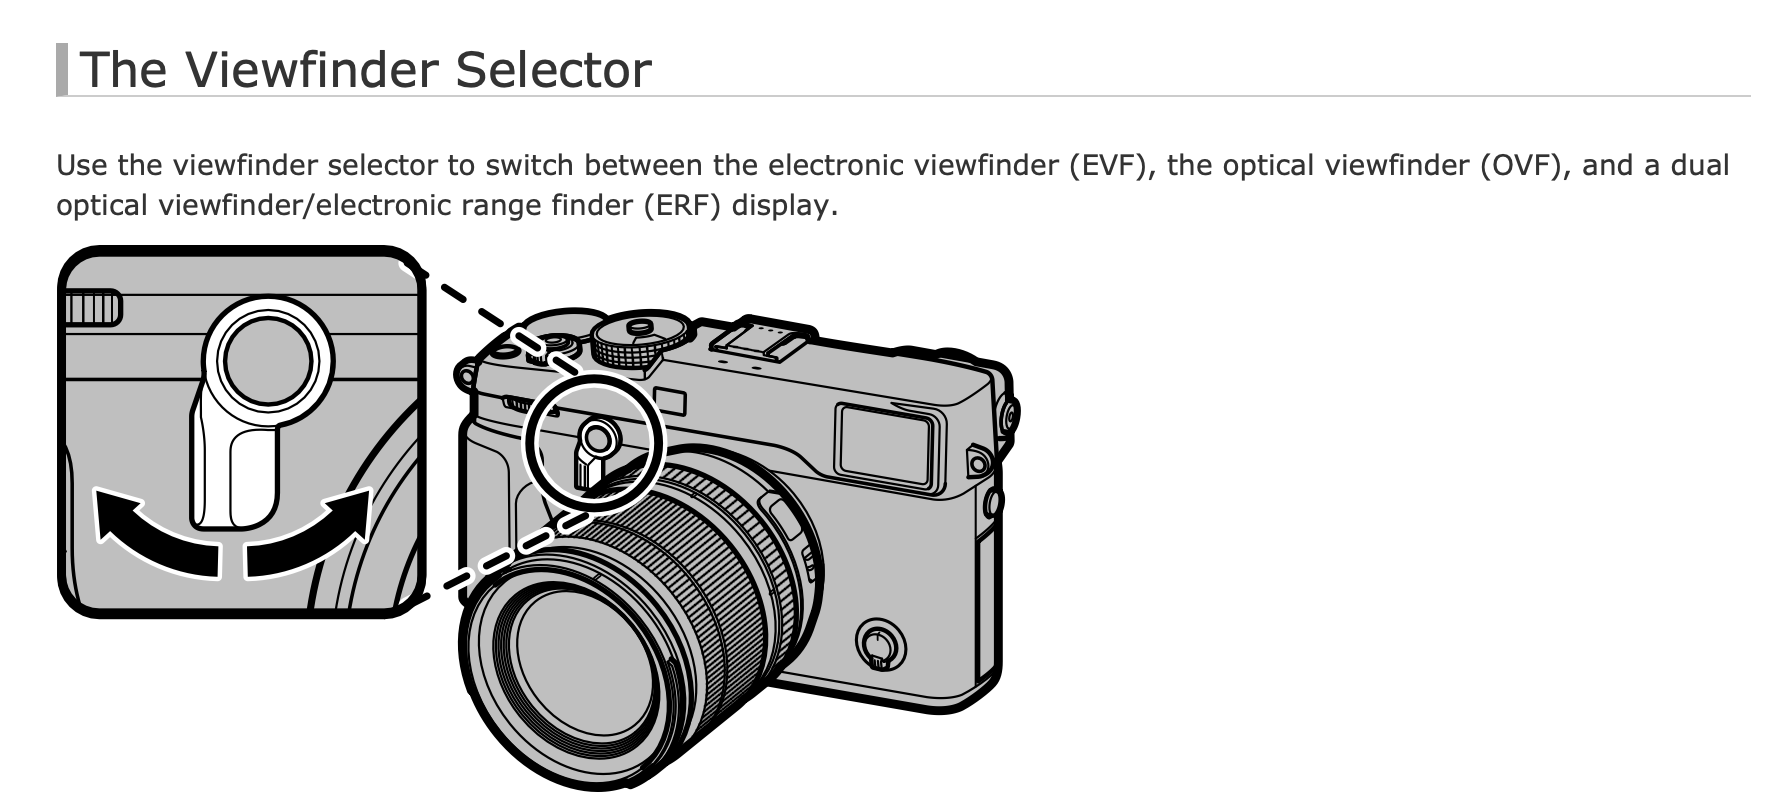
ERF: ERF mode by putting the viewfinder to your eye and using the Viewfinder Selector while in OVF mode to engage the ERF
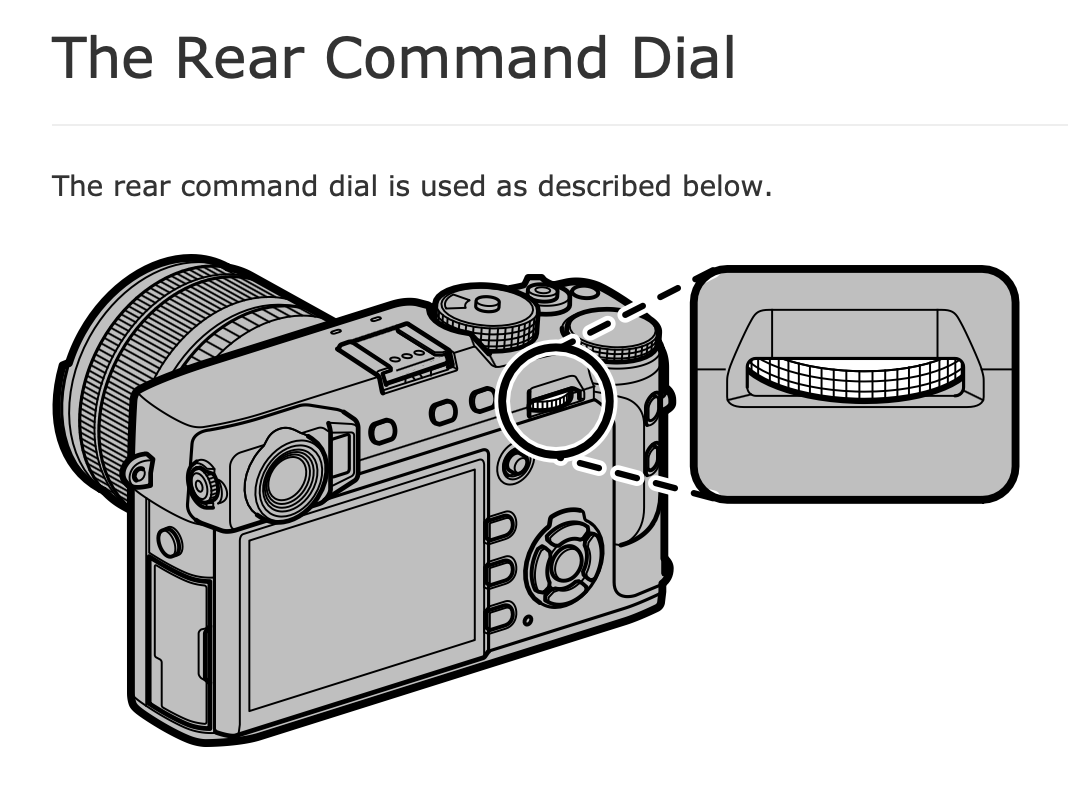
ERF magnification: With the ERF engaged and the viewfinder to your eye, press the Rear Command Dial until you get to the preferred magnification level. For critical focusing at wide apertures, I prefer to use the maximum magnification; for zone focusing, I prefer to use the medium magnification.
How to Use the Camera in ERF
Now that you have the camera setup, the fun begins. To use the camera with manual focusing and ERF, you treat the camera a bit like a Leica rangefinder:
- Put your focus target in the middle (where the focus single point box is)
- Adjust the focus using the focus peaking in the ERF
- Recompose the frame using the OVF framing box
- Take the shot
Once you get the hang of it, the whole process becomes second nature. I find it so fluid and easy to nail focus on even the most challenging wide aperture lenses like the Voigtlander 50MM F1.2 that I wish Leica would adopt a similar approach. It combines the best of both worlds, the beauty and natural view of the OVF, with the immediate and realtime feedback of the ERF which is directly from the sensor.

I hope the above will inspire you to dig out your old X-Pro2, or better yet, find one for sale secondhand and give it a new lease on life by trying to above for yourself. If you’ve tried this approach, let me know what you think. Do you find it as enjoyable as I do? If you have any other tricks or secrets for the X-Pro2, please feel free to share them in the comments below. I’d love to see this camera get a new lease on life.
Discover more from fcracer - Travel & Photography
Subscribe to get the latest posts sent to your email.
This is how I have worked with my X-Pro2 and my Pentax Takumar lenses for years already. Except for close focus, then I switch to the EVF (parallax).
I recommend setting focus highlight peaking to Low. More precise focus confirmation than High.
Hi here I am thinking I would sell my Xpro 2 which I love and go down the Leica path but I won’t
Thanks a great article and reflects my opinion too
You can’t really go wrong with a Leica! If you buy second-hand M, you can typically use it for a few years and then re-sell it with about $50/month depreciation. You can read about my Leica journey here.
The optical finder addition overcomes the difficulty of seeing an electronic viewfinder in bright sunlight. I have both xpro2 and leica M10-R.
Hi, X-Pro2 user here since early 2017. I always thought EVF isn’t needed, so new X-Pro4 without EVF would be another step to puristic photography experience. Modernised brighter OVF with ERF would be good enough for a few of us! 🙂
Cheers!
Peter
Hi
Thank you. A well-written and important topic.