Capture One Mobile has advanced significantly in the two years since I wrote a post about a suggested workflow, so I thought it was time for an updated view.
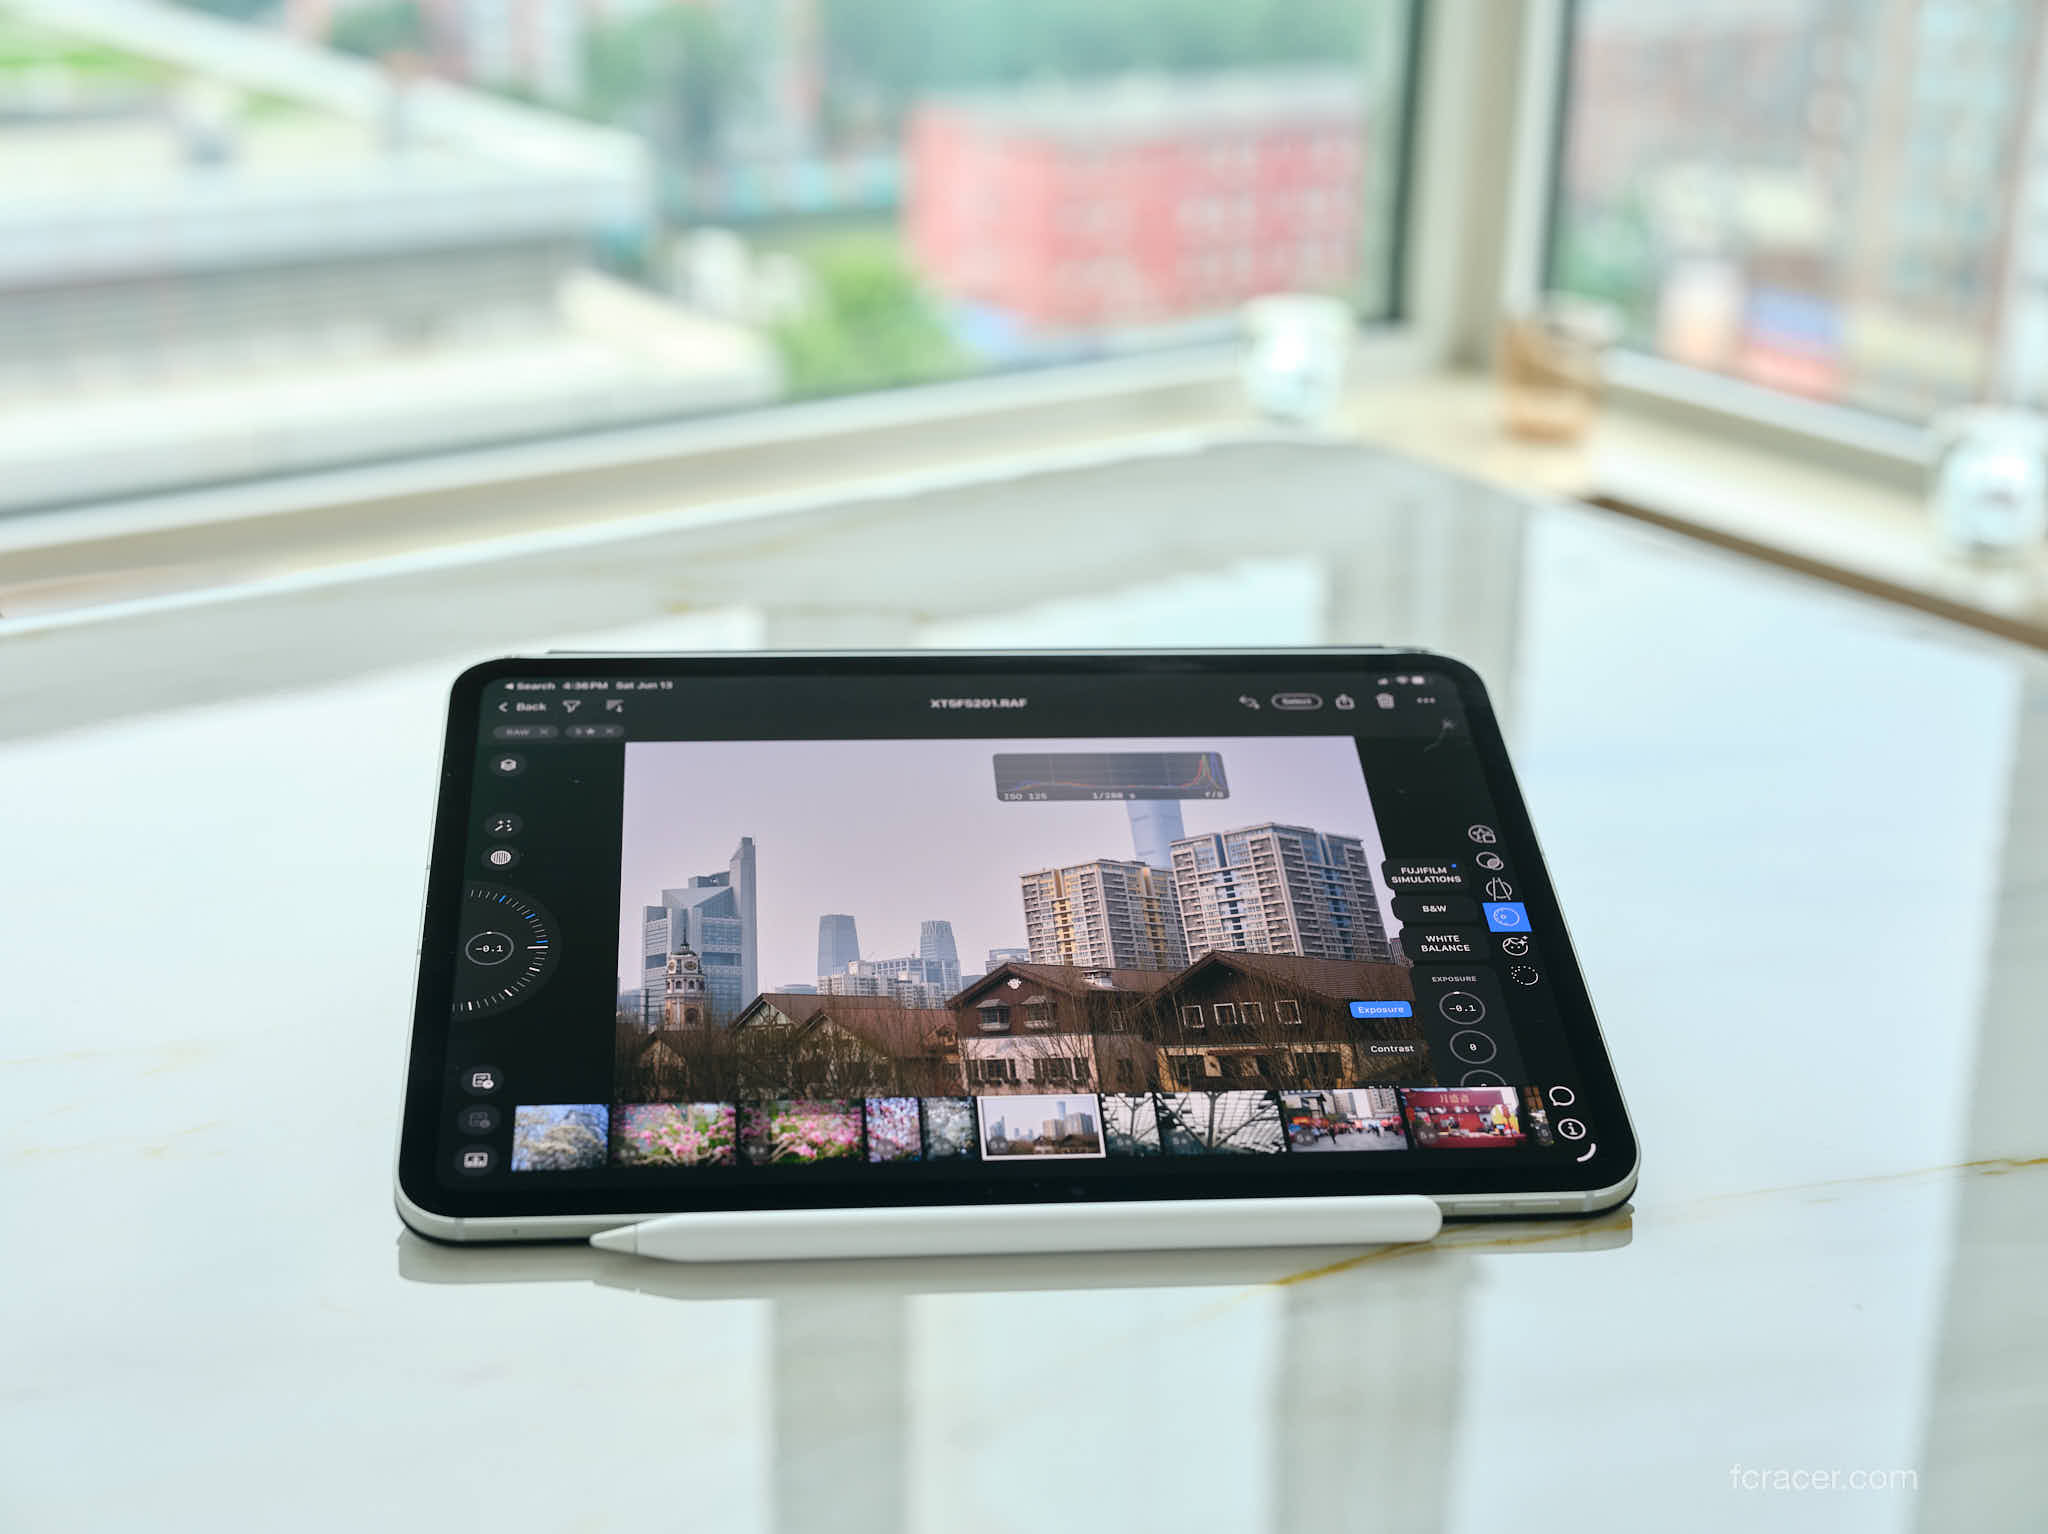
For most of my recent trips, the images you’ve seen have been ingested, post processed and exported using an iPad Pro M4. This has made my editing much more efficient and my backpack a lot lighter as I didn’t need to bring both an iPad and MacBook Air.
Ingesting Images
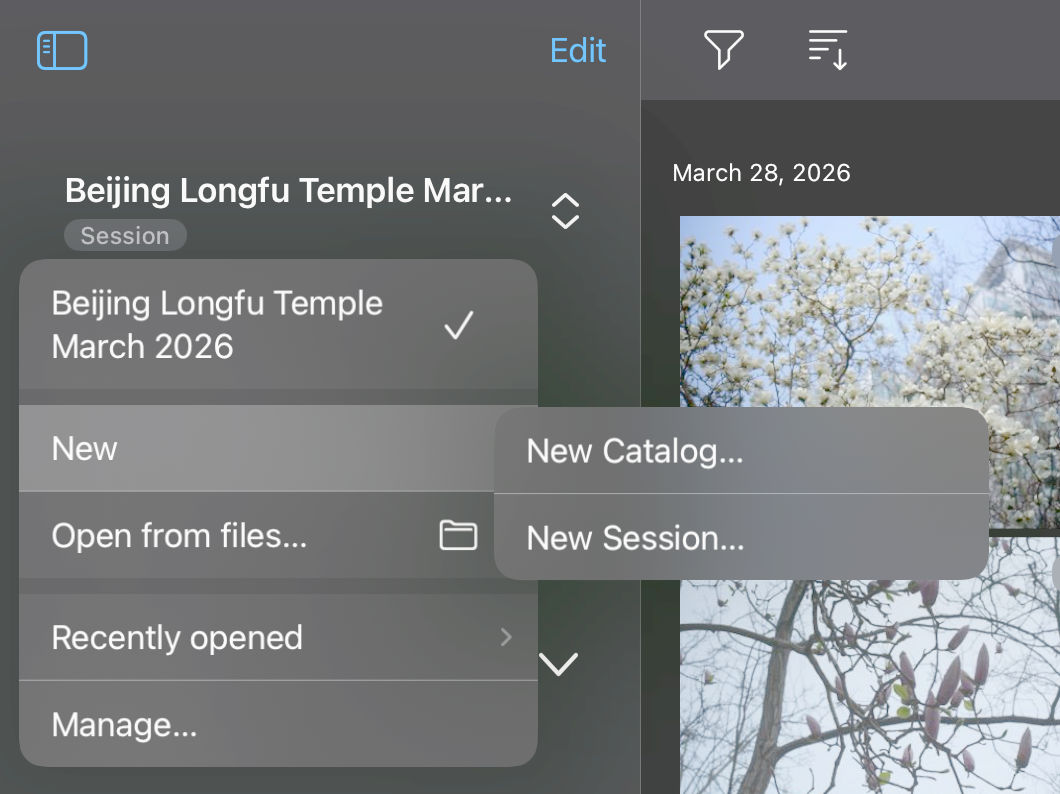
Capture One has made this super easy now with the recent updates that allow us to use Sessions as well as Catalogs.
- Either use a memory card reader or in the case of the modern cameras, directly connect the USB-C cable to the iPad and place the camera in USB card reader mode.
- Open Capture One Mobile and click the
 folder icon.
 - Click on an existing Session or create a new Session. Conversely, we can create a Catalog or use an existing one. I recommend working with Sessions as it provides the most flexibility and ease of use.
- Select the images’ source such as the memory card reader or camera.
- Select the destination of where you want the images to be saved to. Since I exclusively use Sessions, I always select the Capture folder in the Session.
- Select the images you want to import and then click Import. One interface improvement Capture One can make is to allow filtering at this stage; we’re not able to filter for RAW images only at ingestion and must import both RAW and JPEG.
- Once the images are imported, you will see them at the destination you previously selected.
Organizing Images
- Go to the Current Capture Folder.
- If you want to edit only RAW images, filter for RAW and any other parameters that will help you find the right images such as date filters.
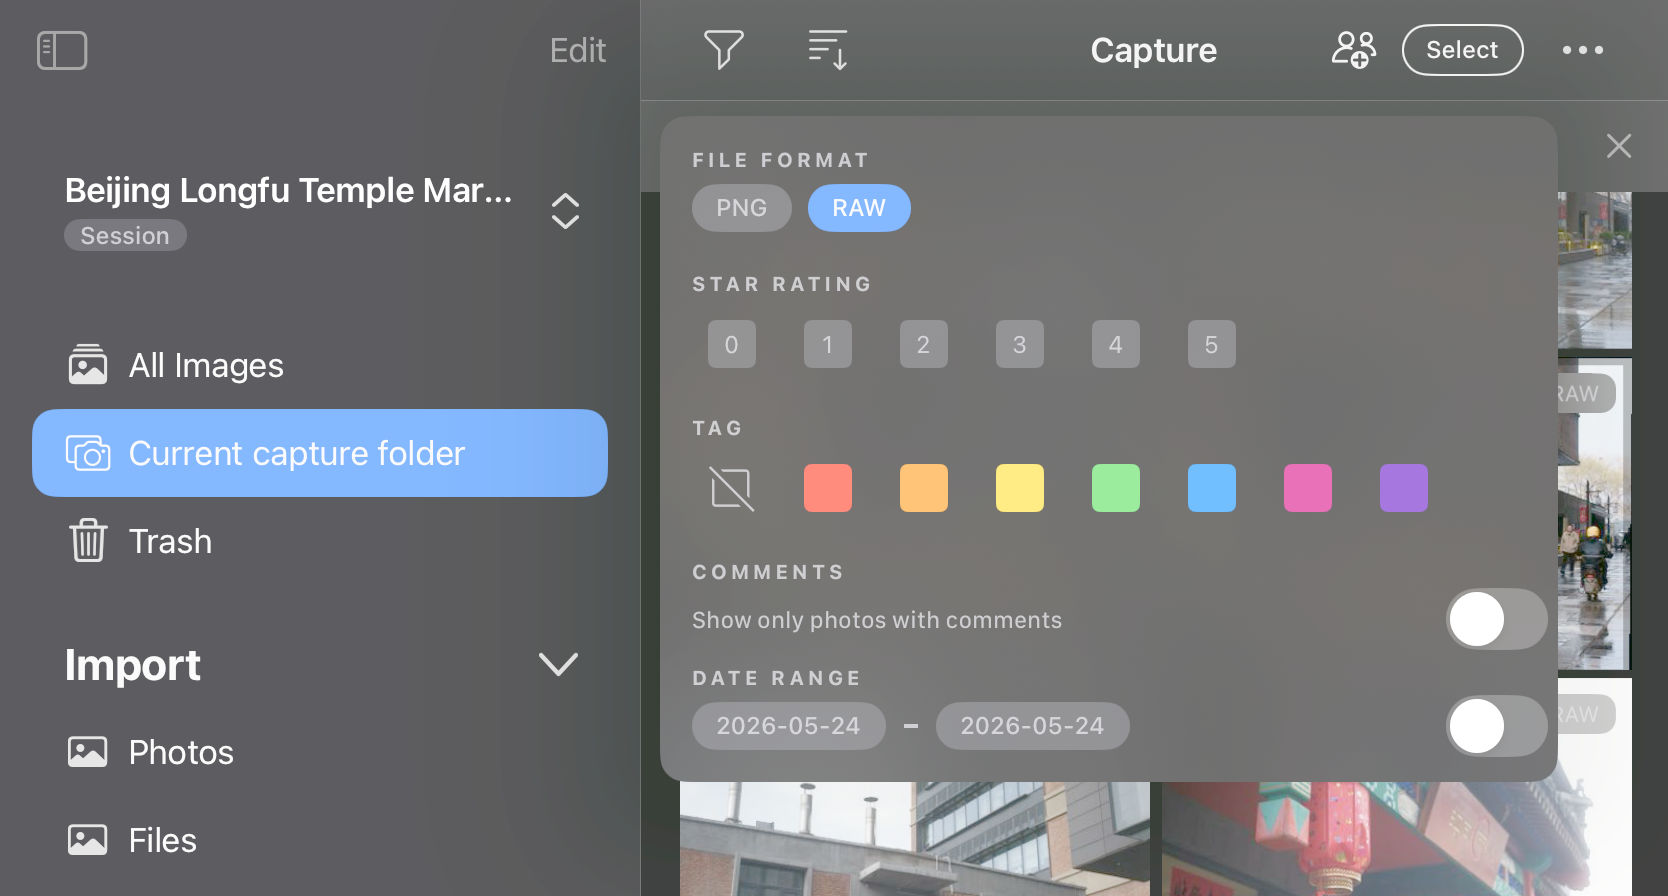
- This filter can also be used to delete JPEG versions if you don’t want them taking up precious space on the iPad.
- Please note that if you delete the images from the All Images section, this will also delete the images from the Session or Catalog.
Editing Images
Capture One has made major improvements in this area over the past two years. Three major missing tools have now been incorporated in Capture One Mobile including Layers, Levels, and AI-Rotate/Keystone. Even more exciting, they’ve brought the AI Retouching tools to Capture One Mobile.
While on the go, we want to have quick results so “Styles” are a great way to get to an excellent result without a lot of effort. I personally use RNI Films but Capture One also has several compelling styles packages available for sale.
The interface of Capture One Mobile is different than the desktop, but there are some hidden gems that will help you become efficient very quickly. I’m not a fan of the default settings for the wheel; it’s counterintuitive in that turning clockwise reduces the intensity of the tool and it takes too many turns to reach the destination.
I much prefer to use the tool itself or as Capture One calls it, “Quick Edit”. To use Quick Edit, you click on the tool and drag up or down. This will increase or decrease the intensity of that tool. To make this work even better, if you’re right-handed, you can move the tools to the right in Settings (accessible by clicking the three dots on the top-right).
Before beginning, I suggest you confirm the following Settings:
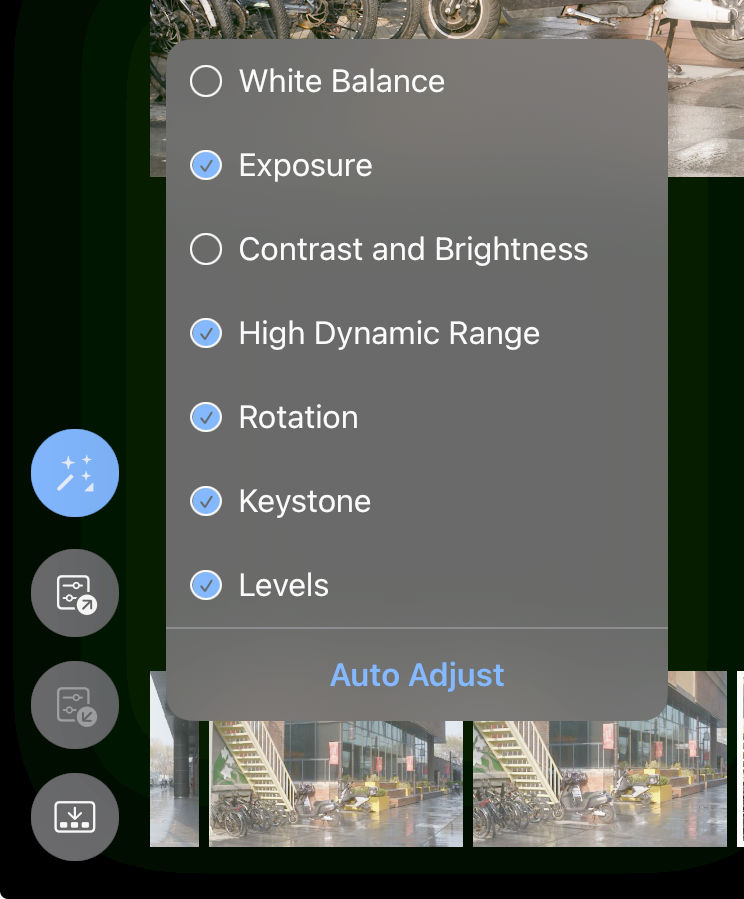
- Long-click on Auto-adjust magic wand and select: Exposure, High Dynamic Range, Rotation, Keystone, Levels
- Settings > Appearance > Tools Right: On
- Settings > Appearance > Shadows: On (with a low threshold of 1-3)
- Settings > Gestures & Shortcuts > Gestures > Quick Edit Scroll Direction – Natural: On
- Settings > Gestures & Shortcuts > Gestures > Wheel Scroll Direction – Natural: On
Suggested Image Editing Workflow
- Styles. Using the Styles tool, select a style that suits the image. You can also add styles you’ve purchased on the desktop to iOS by following the guide from Capture One’s website.
- Composition. Using the Shape tool, adjust the composition so that any further adjustments made will be accurately reflected in the histogram. Adjust the image size, rotation and keystone.
- Black & White or Colour. Under the Adjustments
 tool, use the B&W tool to select whether you want the image to be black & white. If you turn B&W on, several additional settings will appear to adjust the intensity of the colours that influence the black & white conversion.
 - White Balance. Under the Adjustments tool, use the White Balance tool and either adjust the Kelvin and Tint manually, or use the picker tool to identify the brightest, non-clipped neutral part of the image.
- Auto-adjust or manual adjustments. You can either use the Auto-adjust magic wand or manually make the remaining adjustments.
- For Auto-adjust, click the
 magic wand, which if using the settings recommended above, will update exposure, highlights and shadows. I typically prefer a contrasty image and will usually dial down some of the shadows recovery that auto-adjust implements.
 - For manual, under the Adjustments tool, select the Exposure tool and adjust exposure, contrast, brightness and saturation, and under the HDR tool, adjust the highlight and shadow.
- For Auto-adjust, click the
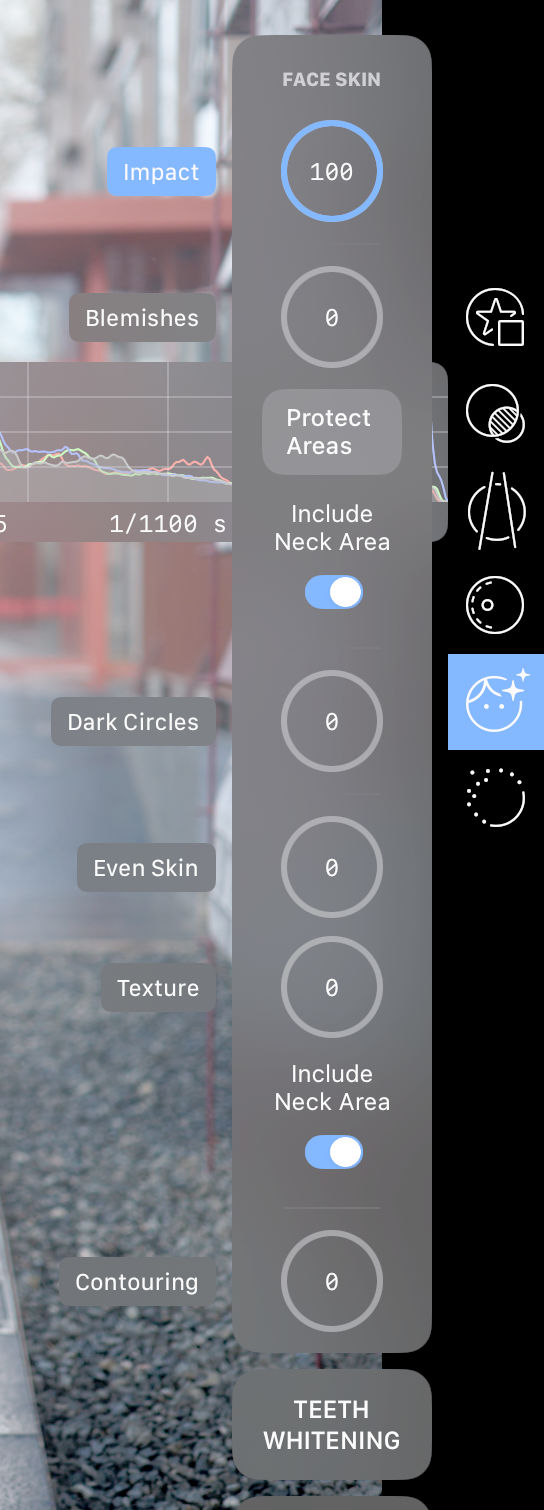
- Retouching. This is my favourite new addition to Capture One Mobile. With a single click (when saved as a Style), the people in the image can be retouched with AI enabled skin-smoothing, blemish removal, dark eye circle reduction and teeth and eye whitening. It’s remarkably good and can be trusted to do the job without further editing.
- Refinement. I don’t typically bother with these settings unless it’s going to be printed, however if the image needs it, it can be further refined by adding Clarity, Dehazing, or adjusting specific colours under the Adjustments tool. Sharpening, Noise Reduction, Film Grain and Moire reduction can also be implemented from the Refine tool.
Exporting Images
You can either export the single image by clicking on the Share/Export  button up top from the image you’re editing, or by doing them as a batch. I prefer to export as a batch so that I can grab a coffee while it churns away. I will typically export Full Scale with around 80% quality, or a 2048px long edge with around 50% quality for posting online.
Transferring Images
This is another area that has improved greatly in recent iPadOS and Capture One Mobile updates. It’s very easy now to either move the Capture One Session to a connected drive or transferring it via USB-C or Airdrop. Airdrop works surprisingly well if you have a good home WiFi setup. My UniFi setup can Airdrop Sessions in very short order. A small tip if you’ve started an Airdrop that’s going slowly; you can connect a cable while it’s transferring and Airdrop is smart enough to switch to that connection rather than WiFi.
To transfer the images to your desktop workflow, you have multiple approaches available:
Entire Session:
- Go to the Files app on iPadOS, open the sidebar and click on On My iPad, click on Capture One and Documents.
- Select the Session you’d like to transfer and click Share. You can then choose to use Airdrop to another device or Copy to an external SSD.
Selected Images:
- Select the images that you want to transfer. Using star filters helps a lot here as I typically will use five stars for images ready for export or print.
- Click the Export button.
- Select EIP under Format.
- Click Export.
- Select Save to Files and save it to an attached USB SSD drive or via Airdrop.
- Create a Capture One Session on your desktop/NAS and move the files from the USB SSD to the Capture folder.
- Open the Session, select all the EIP files, right-click on any file and choose Unpack EIP.
That’s it. It’s so simple and intuitive now. Further to the above, Capture One Mobile supports saving images on the cloud so that images can be synched between mobile and desktop versions without having to take the above steps. The places I often travel to don’t have fast enough internet connections to make this efficient so I haven’t invested much time into the cloud offering.
Conclusion
With all the functionality that Capture One Mobile now has, I have little incentive to bring the MacBook Air on my trips. This has resulted in a significant weight savings. The ability to use an Apple Pencil has also been a big benefit, especially when masking layers.
If there’s one thing I wish Capture One would do is to make the interfaces the same on both MacOS and iPadOS. I appreciate that there are many users who are opposed to this and prefer the specialized interfaces, but I’d rather invest once in an interface and leverage it across devices. A secondary wish would be to make the app more energy efficient, but that is likely an insurmountable challenge given the intensity of image processing, especially when using the AI assisted tools. Perhaps this will push me to upgrade to an M5 iPad in the near future!
I hope you’ve enjoyed this post and found it useful and that it encourages you to give it a try. Please feel free to ask any questions in the comments below or share any advice or better approaches to efficiently using Capture One Mobile.
Discover more from fcracer - Travel & Photography
Subscribe to get the latest posts sent to your email.
Hi,
I love always to read your articles, this one with CO Mobile is very interesting.
I remember also your article about choosing a Macbook Air M2 to use Capture One, did you update your Macbook Air and what would be your advice concerning a Macbook Air to use CO today (with retouch new tools) ?
Thanks !
Olivier
Hi Olivier, thank you for writing in. I did indeed update to the MacBook Air M5 with 32GB of RAM and 1TB SSD. Subjectively, it doesn’t feel that much faster than the M2, however this website is about objective measurements so I ran a challenging test.
I processed 153 images taken with the Fujifilm X100VI and GFX100SII that included several with AI retouching. I ran this on the MacBook Air M2 and M5 and timed them. To my surprise, the M5 absolutely trounced the M2: 5:27 to 10:38!
I would put the subjective feeling down to the way software uses the processors. In day to day regular use, the M2 is more than sufficient, but when the software can leverage all the CPU and GPU cores and AI acceleration, the M5 obliterates the M2.
I’m in the process of writing a review for the M5, but I’ll give away another key benefit. I really enjoy the WiFi7. Even though it’s capped for battery reasons, I can still get 1.2 Gbps in my apartment, which enables useful wireless access to my NAS.
I hope the above has helped. If you’re using AI tools, I would definitely recommend the upgrade. Let me know if you’d like me to run further tests. I still have the M2.
Hi, thanks a lot for your answer, yes It’s always interesting to put in perspective objective and subjective tests. I’m mainly using CO for my workflow and i was wondering if concerning AI tools you was referring to CO AI tools, mainly for the retouch tab and the new Noise Reduction ? For these new tools there is maybe a gap between the M2 and the M5 ?
Thanks fro your help !